The framework I chose to use for the presentation slides is called reveal.js. It is an HTML framework meaning it will run in any HTML 5 capable browser. Looks a little better than a PowerPoint presentation.
Navigation
Useful navigation keys in the presentation. In addition to navigating with the keys below, you can swipe (tables/smartphones) or use the navigation arrows on screen in the lower right.
Toggle full screen: press [F11].
Advance to the next slide: press [n] or [SPACEBAR].
Go back to the previous slide: press [p] or press and hold the [SHIFT] key while pressing the [SPACEBAR].
Display presentation overview: [ESC] then use the arrow keys or mouse to select a slide. [ESC] again will exit overview mode.
Links
Clickable links are colored in brownish text.
Presentations
Three variations are available: presentation version is viewable in a browser. Printable version for printing or saving in a different format (Chrome, Chromium, and variants compatible only). Finally a PDF version.
They may take some time to load because I left original images untouched and some were a couple MB in file size.
TX – page 6
-Modes
-Loading images
-Picture clipper
-Transmitting an image from s.pix
-Transmit loaded image
Template editing- page 7
Introduction
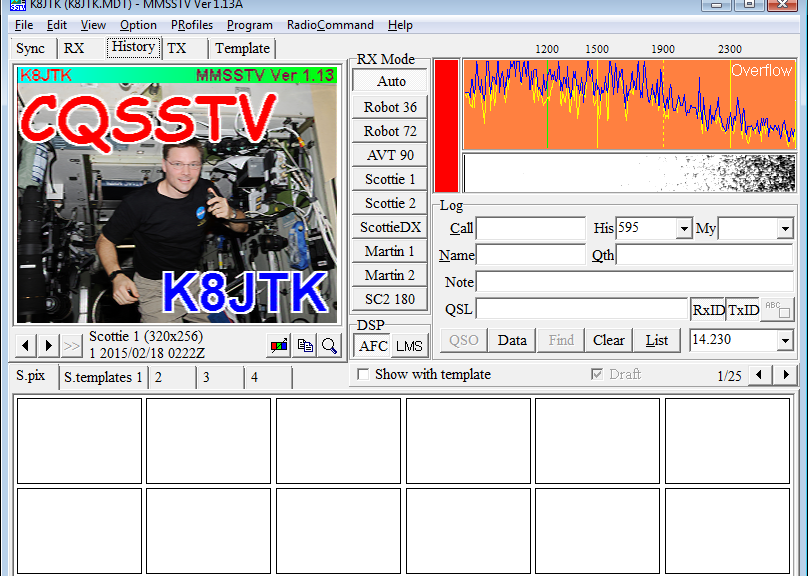
This document will demonstrate installation, setup, and basic use of MMSSTV. MMSSTV stands for Makoto Mori (JE3HHT, creator) Slow Scan TV. It has been the defacto standard SSTV application for many years.
This is written with the beginner in mind and many concepts outlined step-by-step. It will provide direction for further experimentation on your own or on the net and direction for troubleshooting. For SignaLink and audio setup, visit the Radio Interface Setup post.
Prepared for The Lake Erie Amateur Radio Association’s Digital Net (http://www.leara.org/).
Program versions
Program versions used in this document.
Windows 7 – 64 bit
MMSSTV 1.13A – only available on the Windows platform.
This document will show installation, setup, and basic use of Fldigi, Flmsg, and Flwrap. Fldigi stands for Fast Light Digital modem application created by W1HKJ (David Freese, Jr.) and associates. Flmsg is a forms manager with standardized forms like MARS, plaintext messages, Radiograms, Red Cross, and Weather report forms. Flwrap is a file encapsulation and compression tool allowing for reception of a file exactly like the original.
The Fldigi suite has many applications and can operate many, many different modes. For the list of modes, click the “Op Mode” menu in Fldigi. A quick description of the Fldigi suite from W1HKJ:
Fldigi – Digital modem program.
Flarq – AutomaticReQuest file transfer program (works with Fldigi).
Flamp – Amateur Multicast Protocol file transfer program.
Flwrap – File encapsulation for error free transfers over amateur radio.
Flmsg – Formatted message manager – 25 forms including Radiogram.
Flrig – Transceiver control program.
Flwkey – Winkeyer control program.
Fllog – Logbook program – works with Fldigi, Flwkey etal.
Flnet – Net management and database program.
The Digital Net typically operates Fldigi using NBEMS standard methods for VHF and UHF communication. NBEMS stands for Narrow Band Emergency Messaging System (or Software) (http://www.arrl.org/nbems). NBEMS VHF/UHF operating mode is MT63-2KL and Olivia 8/500 or 16/500 for HF operation. HF digital operation is considerably different than VHF/UHF FM digital. HF station operating tips are not covered however application usage is similar.
Flwrap is no longer considered part of NBEMS but is a useful program to send small files. If only operating NBEMS, Flwrap can be omitted and ignored.
This is written with the beginner in mind and many concepts outlined step-by-step. It will provide direction for further experimentation on your own or on the net and direction for troubleshooting. For SignaLink and audio setup, visit the Radio Interface Setup post.
Prepared for The Lake Erie Amateur Radio Association’s Digital Net (http://www.leara.org/).
Sound card calibration for some modes Fldigi supports is important; it is recommended regardless of mode. See the “Sound card clock calibration” section in the “Radio Interface Setup – For getting started with Ham Radio Sound Card digital modes” document. Fldigi method: http://www.k8jtk.org/2015/10/19/nbemsfldigi-sound-card-calibration/.
Testing and troubleshooting – page 4
-Transmit
-Receive
Recording with Audacity – page 5
-Recording settings
-Record all received and transmitted audio
-Timer recording
-Saving
-Playback
Sound card clock calibration – page 6
Introduction
This document will demonstrate basic setup of a radio interface device in the Windows Sound Control Panel to use with Ham Radio Sound Card digital modes. Programs include: Ham Radio Deluxe DM780, MMSSTV, Fldigi, wsjtx, FreeDV, Easypal. In addition, it will demonstrate how to record digital transmissions and play them back.
This is written with the beginner in mind and many concepts outlined step-by-step. It will provide direction for further experimentation on your own or on the net and direction for troubleshooting.
The SignaLink USB was used but these instructions can be adopted for similar devices. Those using other methods may find the settings and techniques useful.
SignaLink and many other external interfaces have external volume controls. Set these controls at half to start. Adjust these controls first as they are the easiest to adjust and fine tune while operating. If a situation occurs where you have too much/little audio with the volume controls set low/high, then adjust the Windows audio levels second.
It is important to point out:
Plugging the same device into a different USB port will be recognized as a new device by the system. This means the audio settings will need to be re-configured. In addition, the audio device settings in the digital mode program may need to be re-configured as well.
The process of setting audio levels is not exact. Each system is different, drivers are programmed differently, hardware interacts differently with the operating system. It will take some time to fine tune audio levels.
Prepared for The Lake Erie Amateur Radio Association’s Digital Net (http://www.leara.org/).
Program versions
Windows 7 – 64 bit
Audacity 2.0.6
Resources
Still having trouble after using this tutorial? Read through the product manual and support documentation. Below are links for popular devices.
Specific instructions can be found online typically by searching: [name of application] [radio interface device]. Example: Fldigi SignaLink USB.
Station setup: MP Antennas Classic Mobile NMO Antenna – This is a local company in Cleveland and were reviewed in QST. Been using their antennas for a long time with great success. Since the antenna is multi-polarized (the MP in the company name), it is supposed to be a good substitution for receiving satellite transmissions without a directional antenna and not worrying about Doppler Shift (which needs to be accounted for in some cases). The height is about 15 feet.
The antenna was connected to my ICOM IC-7000 with DSP settings turned off on 145.800 MHz FM. Used this radio only because my SignaLink USB is connected to it and the one I use for digital operation on all bands. MMSSTV is the Slow-Scan TV program I use.
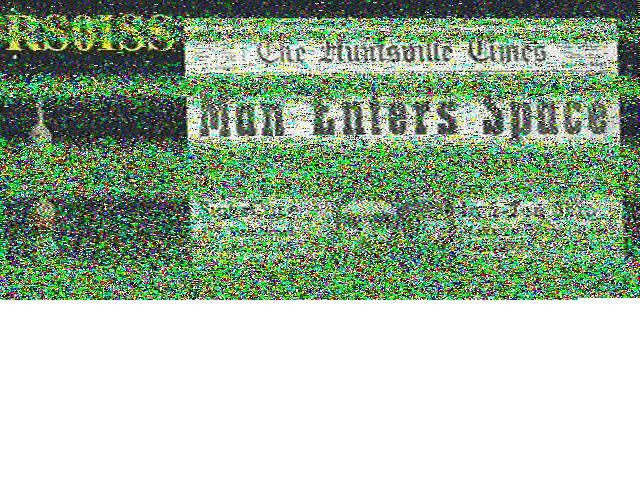
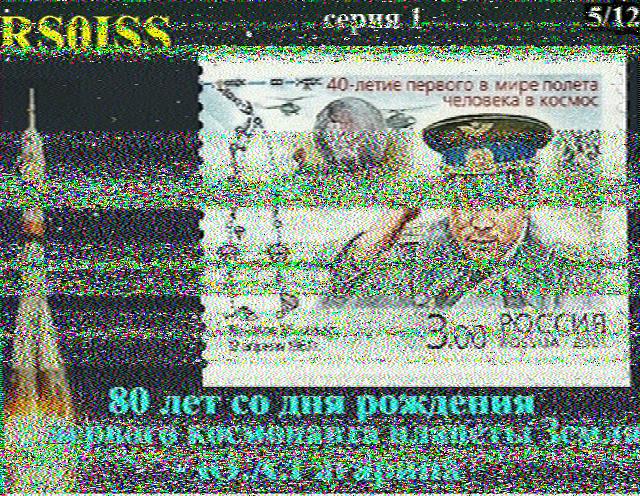
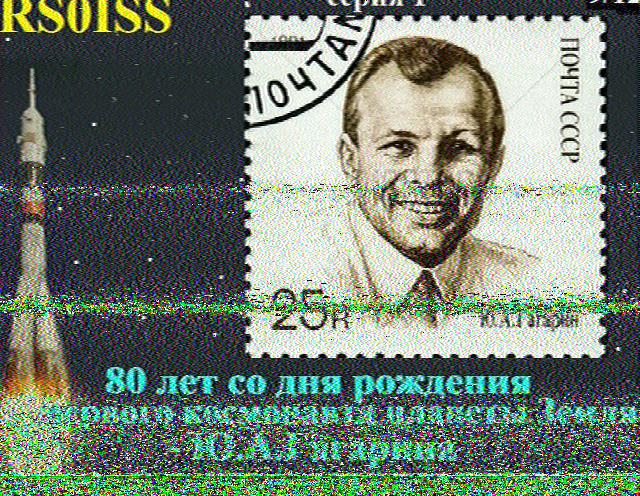
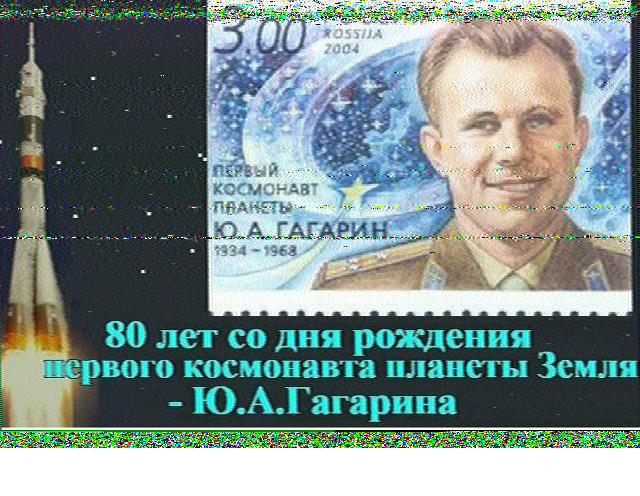
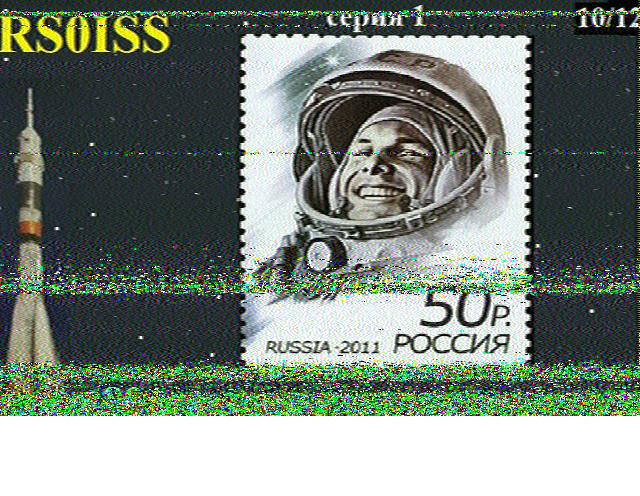
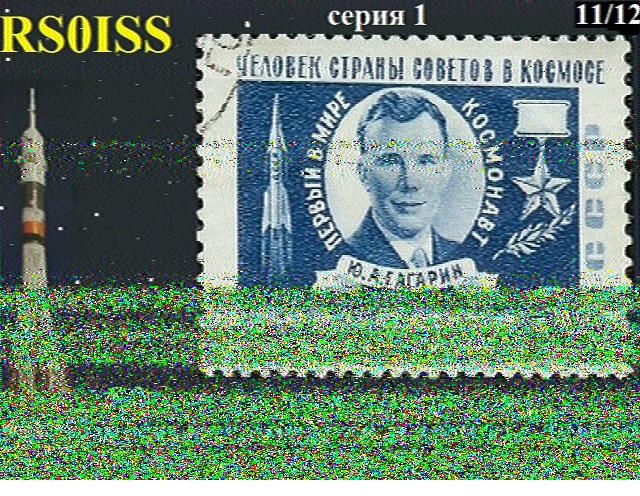
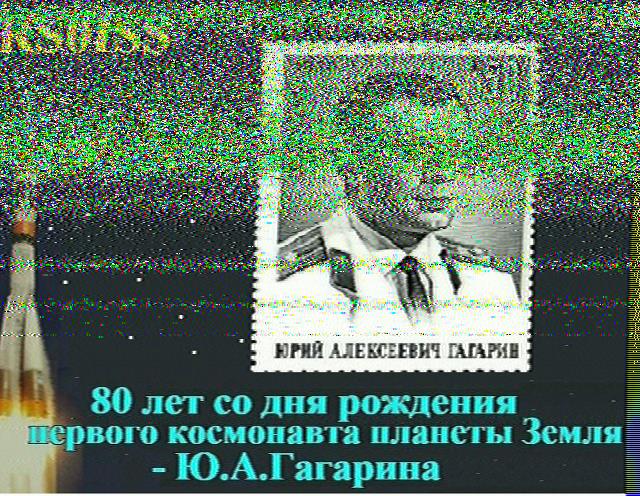
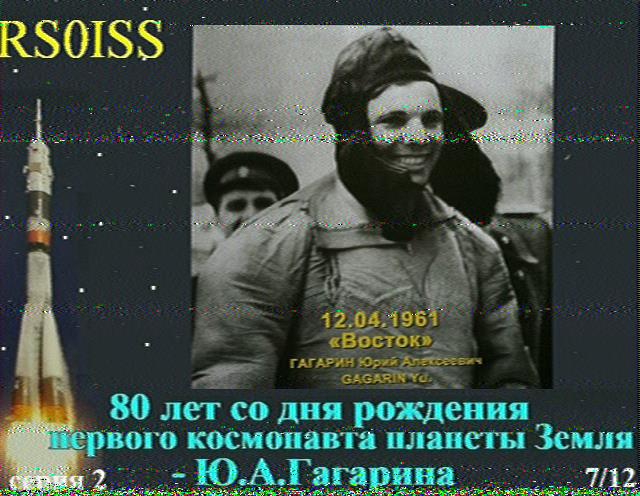
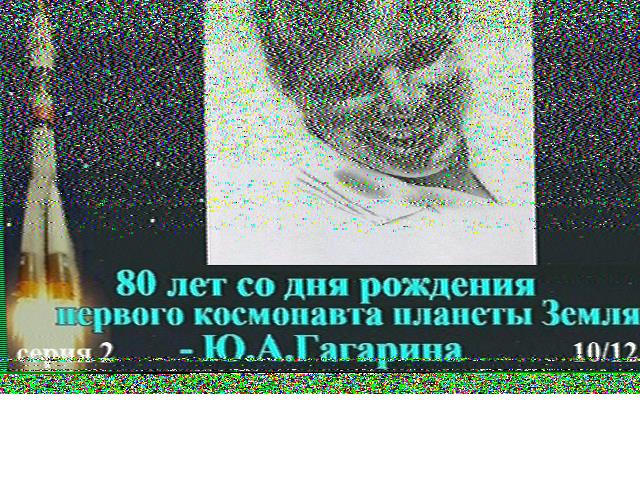
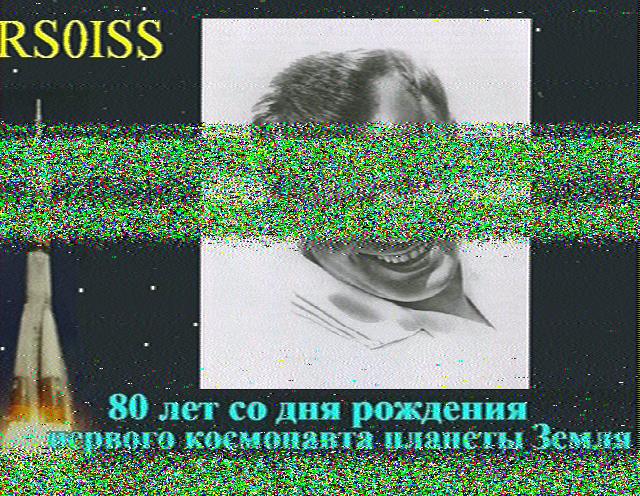
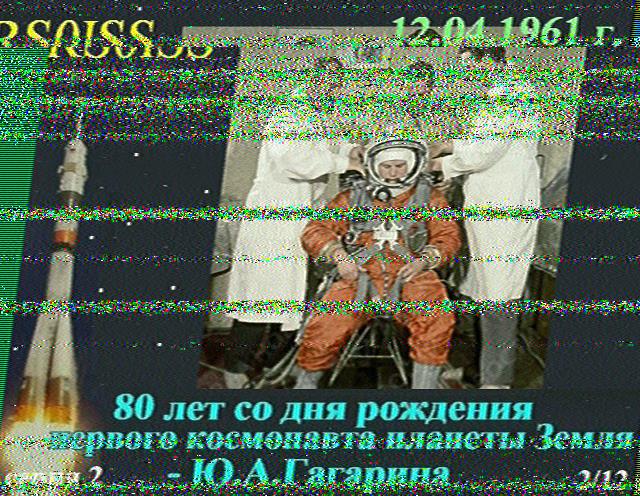
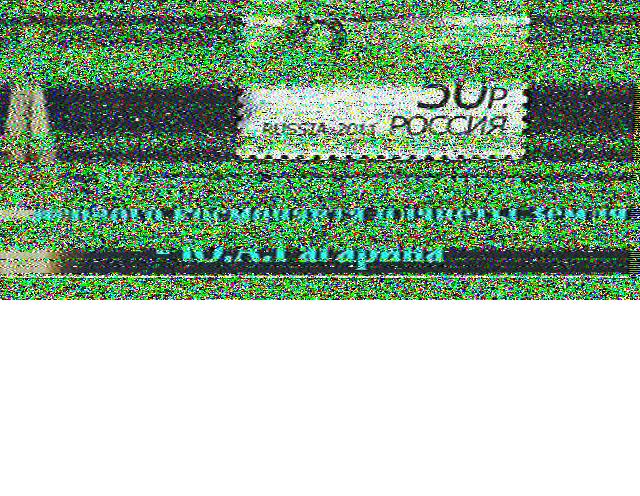
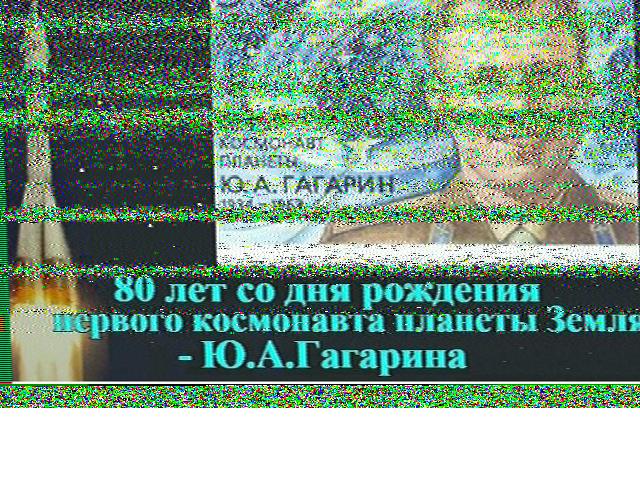
I received 13 images total from my location near Cleveland (EN91bl). Not sure why there was a sync issue on the second day (noted by the green line on the left in some of the images).
The holidays were a busy time at the K8JTK laboratories with a couple RTL-SDR projects. The RTL-SDR is the European TV tuner dongle that was turned into a software defined radio receiver.
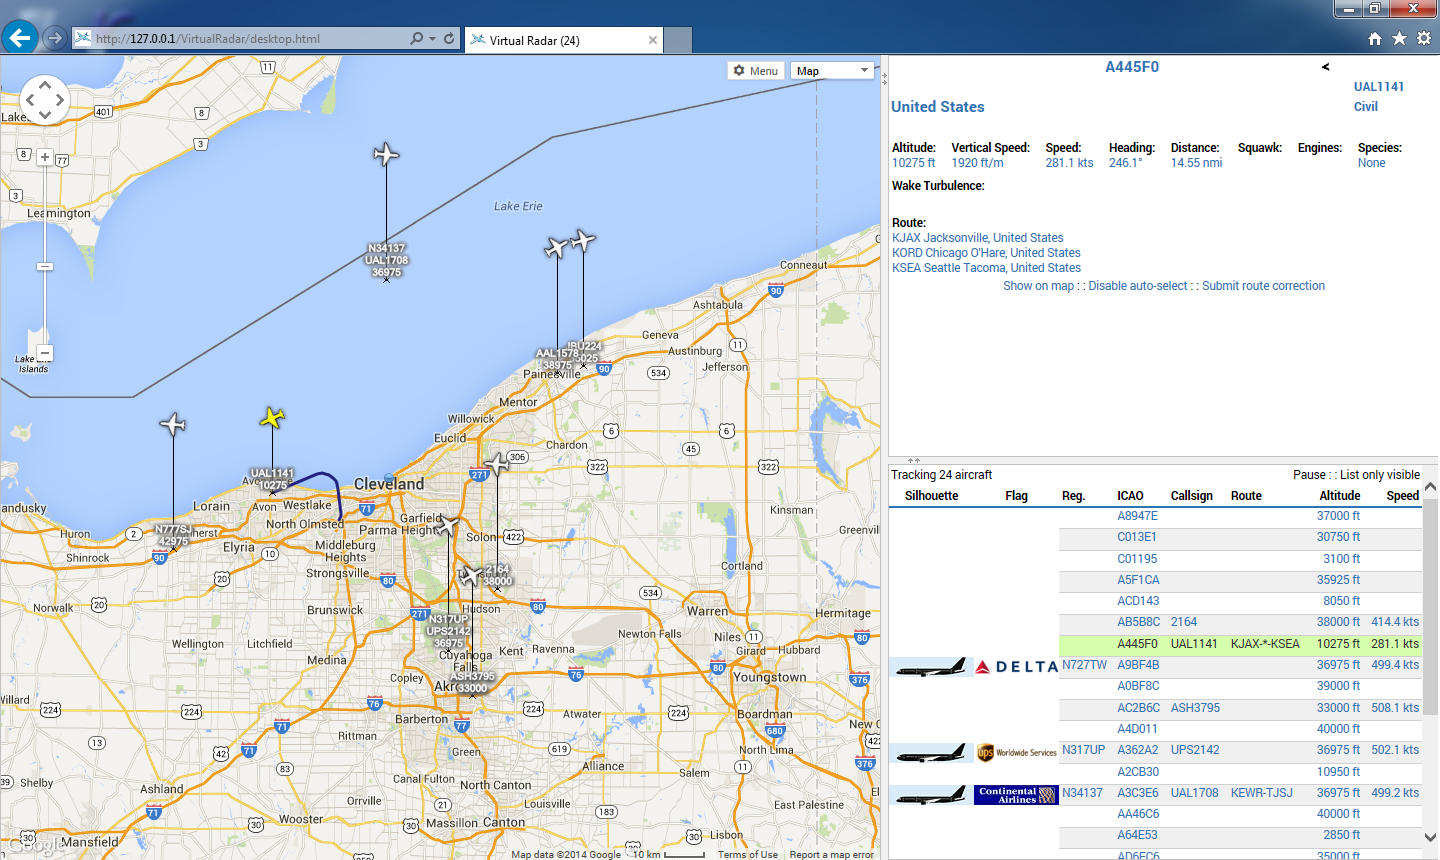
Thanksgiving is one of the busiest travel seasons and I wanted to decode ADS-B data to see how many aircraft were flying around. ADS-B stands for Automatic Dependent Surveillance – Broadcast allowing aircraft to be tracked by ground stations and provide situational awareness to nearby aircraft. This is part of the FAA’s NextGen project and mandated by agencies across the globe.
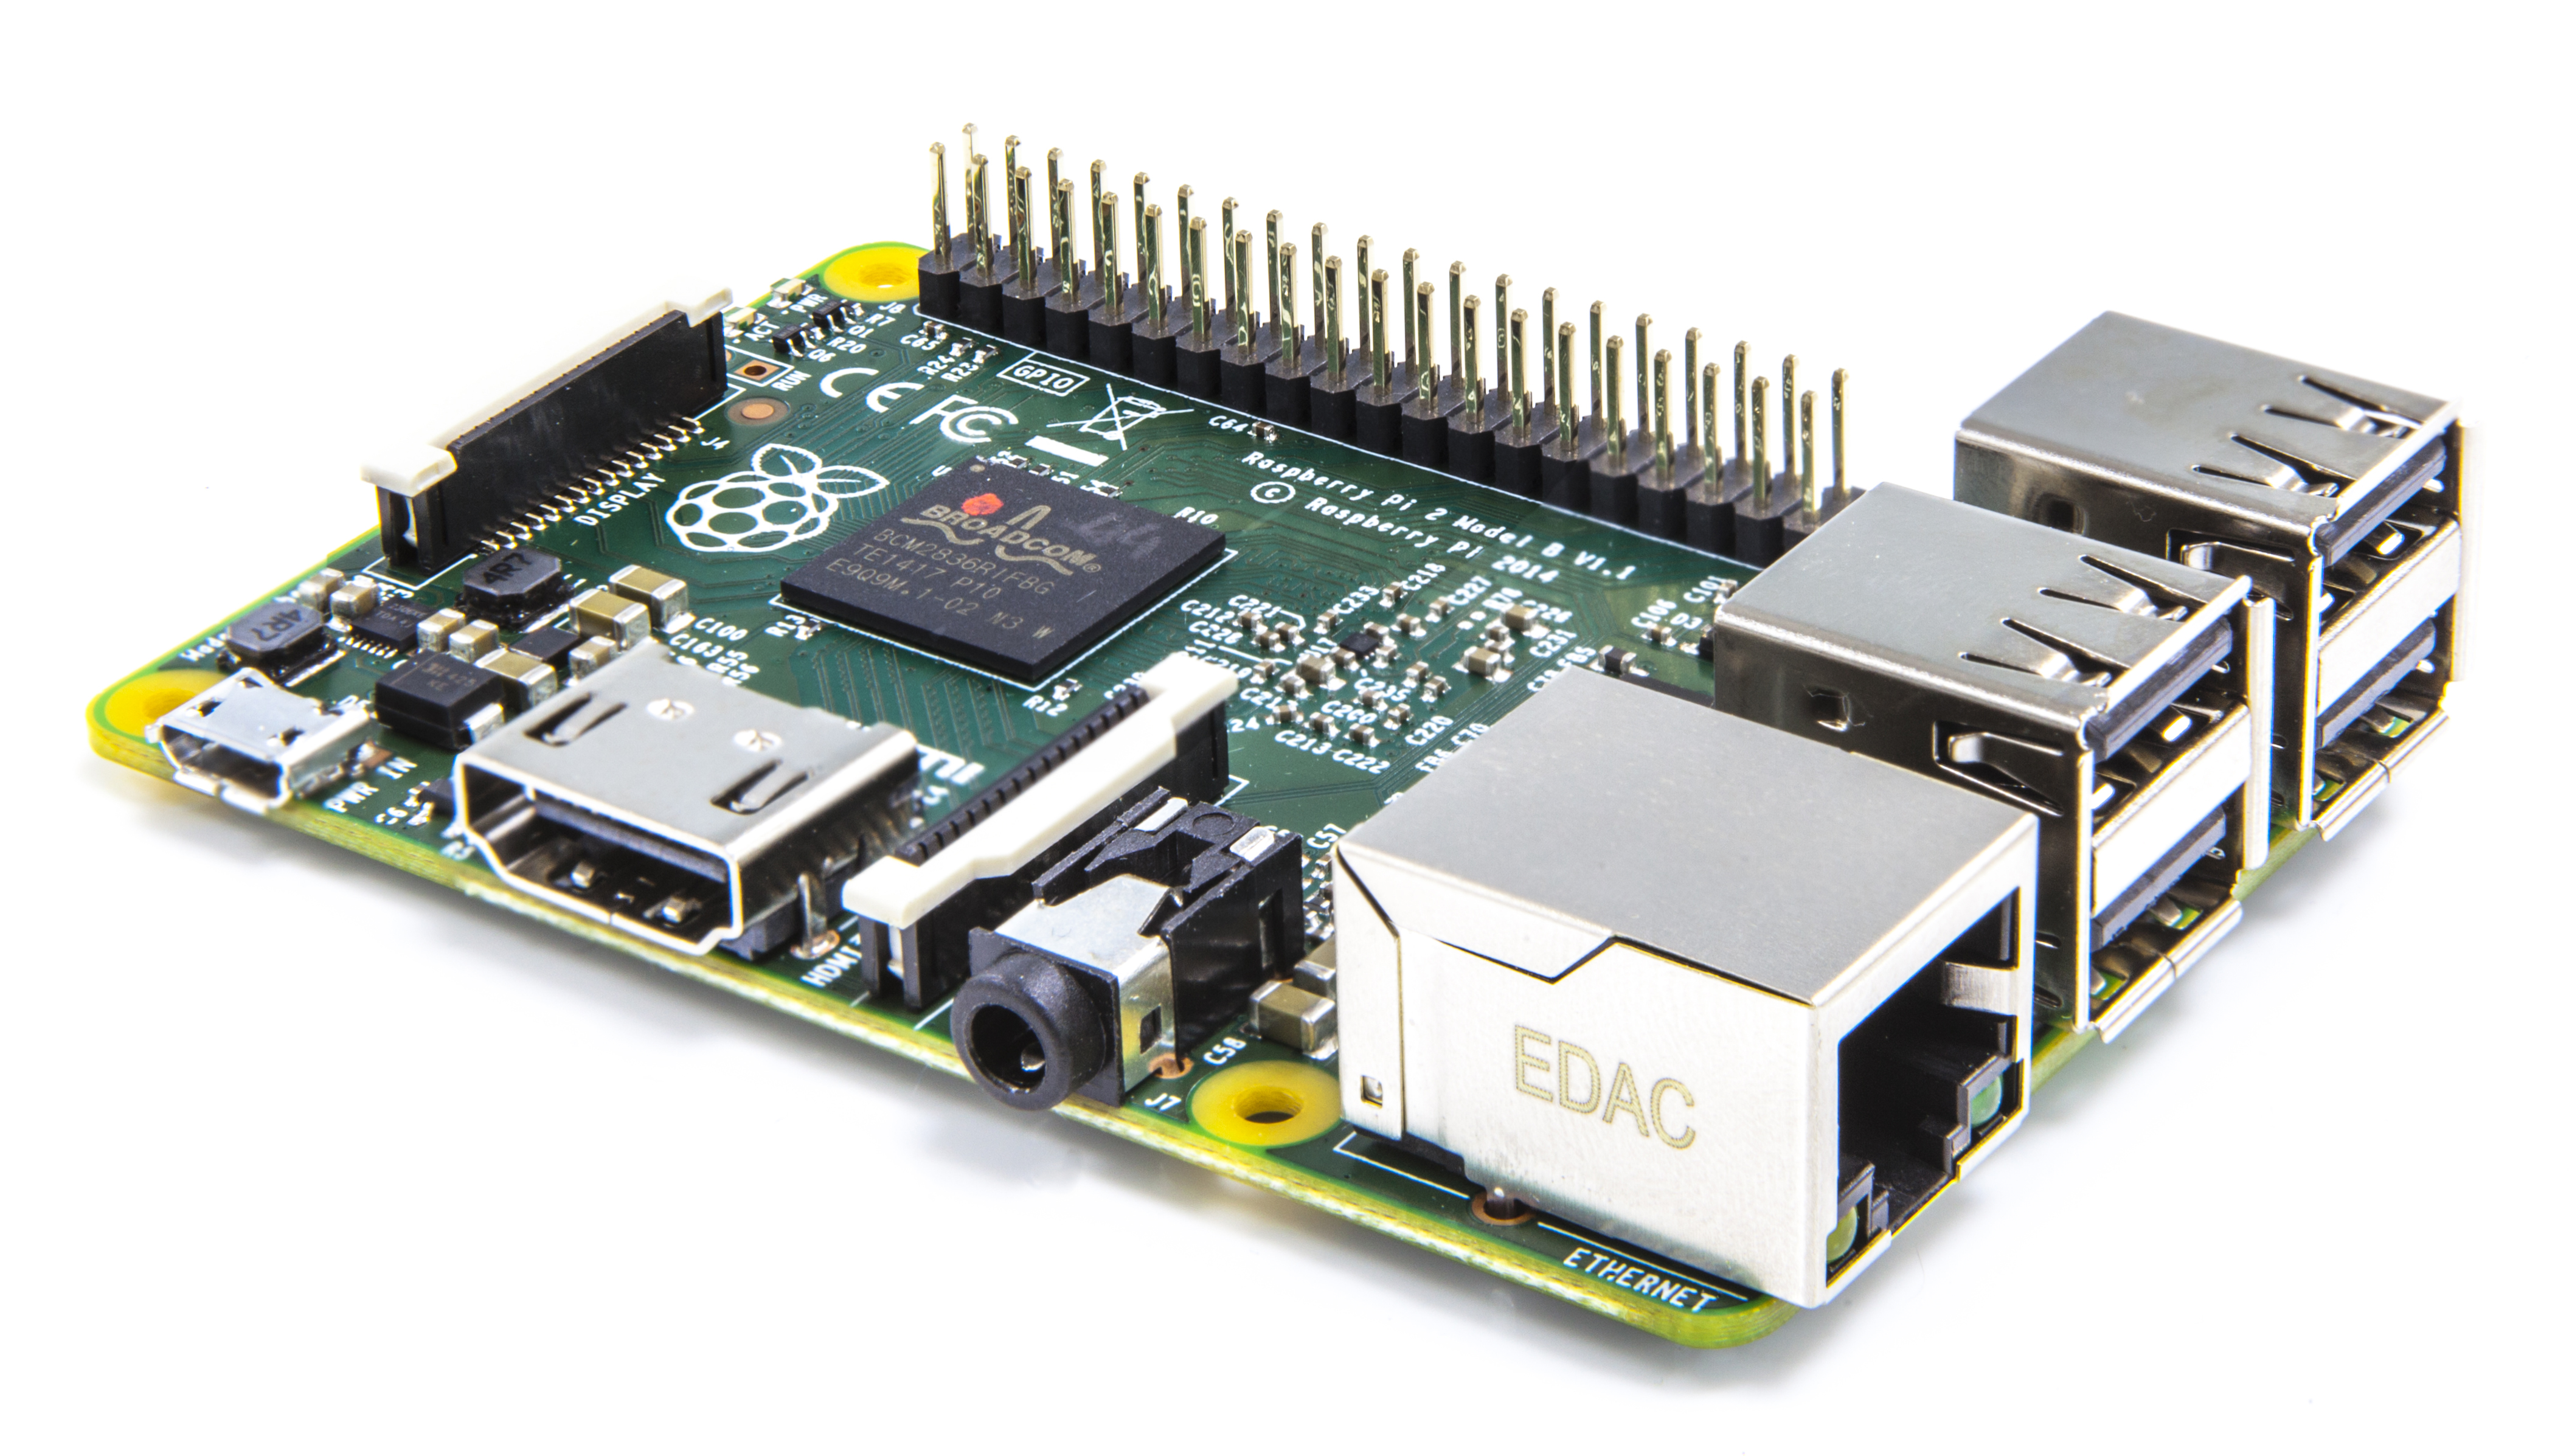
I saw this project in the January 2014 edition of QST written by Robert – W9RAN. He covered building a Collinear Array for the ADS-B frequency of 1090 MHz. I used one of my ham antennas. The RF signal received by the dongle is turned into data packets by a program called ADSB# (included in the SDR# download). VirtualRadar receives those packets, decodes the data, and plots aircraft on Google Maps. This setup can work with a Raspberry Pi and I hope to try this in the future.
Thanksgiving travel in Cleveland, Ohio.
Over the Thanksgiving holiday, I saw 25 aircraft flying around Cleveland on average. I think the most I saw was 48 at once. Not all aircraft have full ADS-B implementations. For example: I would see a call sign but no position data. My receive range (depending on aircraft altitude) was east of Toledo to the PA border and south to Canton. Visit my write-up on this project: ADS-B Decoding with ADSBSharp and VirtualRadar Server.
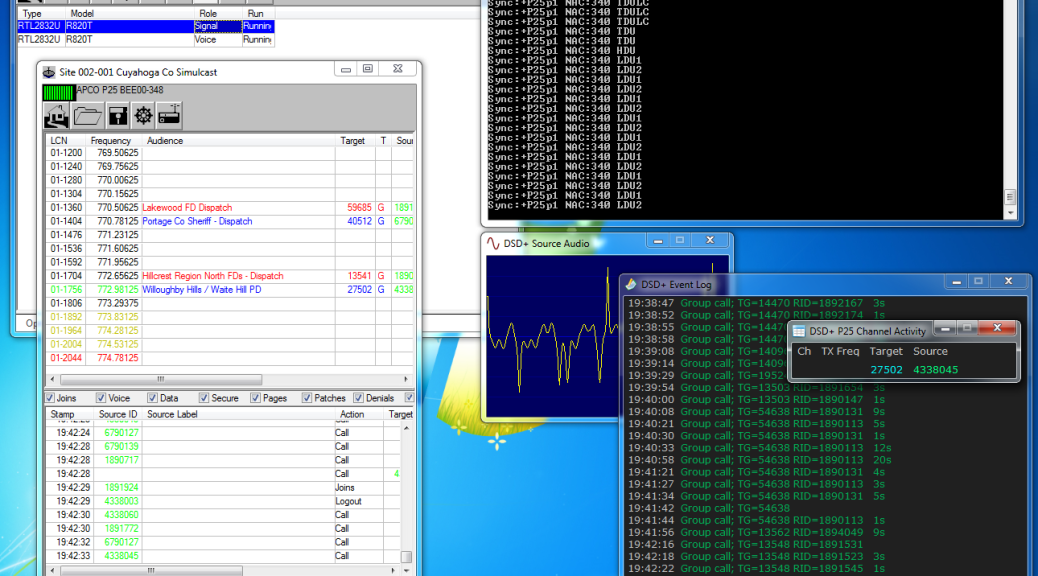
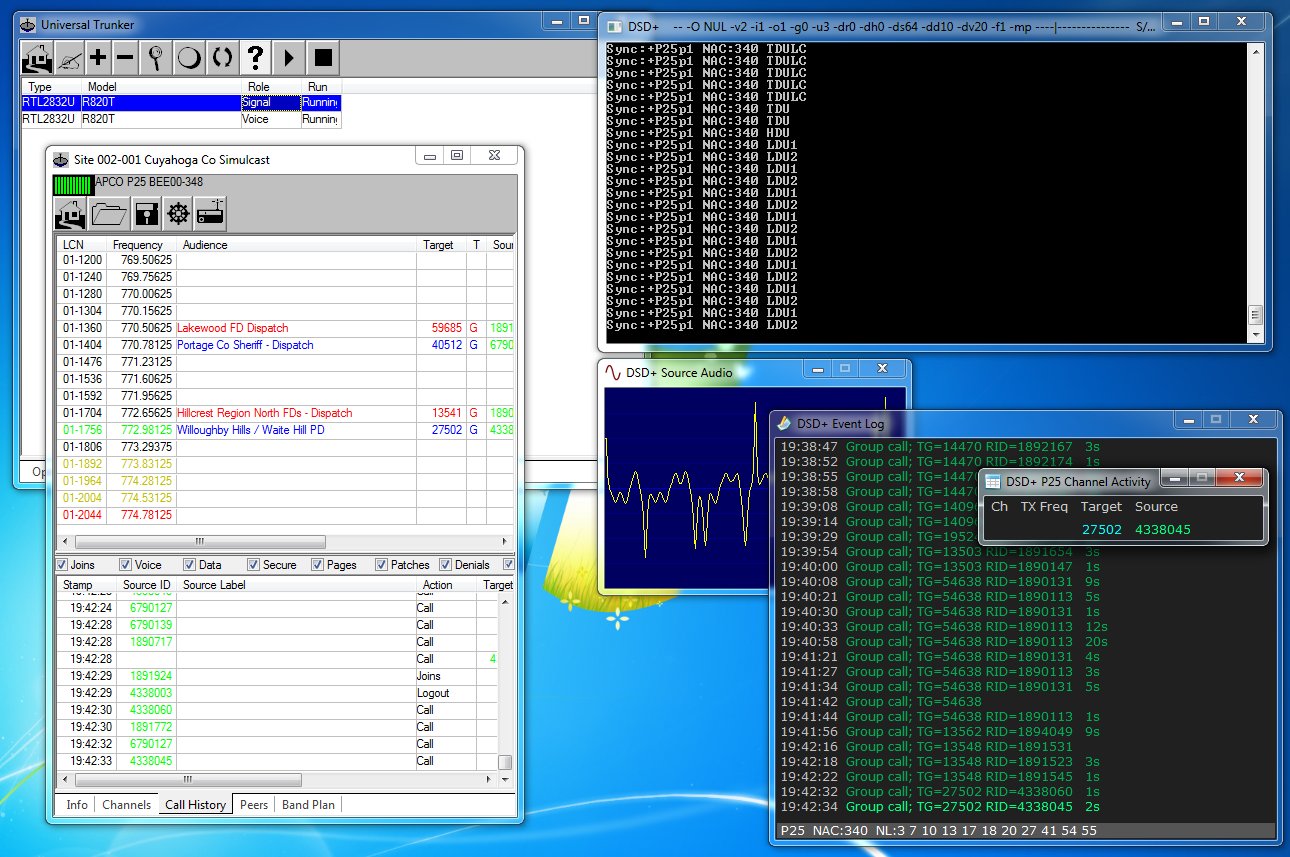
The second project is a little more complicated but it helped me understand how trunked radio systems work. With the FCC narrowbanding mandate in certain RF spectrum, many public service agencies have decided to “go digital.” In my area the MARCS-IP system and the Greater Cleveland Radio Communications Network are most popular. Both are P25 trunked digital systems. P25 is a specification for voice and data transmission. Trunked radio systems operate by having a radio send data to the control channel requesting communication on a talkgroup. The control channel directs all users of that talkgroup to a specified channel. When the user is done transmitting, all radios switch back to monitoring the control channel for further instructions. This is done seamlessly and allows many users (agencies) to use a small set of radio frequencies. Users only hear the conversations on their assigned talkgroup and not other users on the same system.
P25 trunked decoding with a single voice decoder.
Scanners that receive these systems run $500 and go up from there. Using two RTL-SDR dongles and software (mostly free), I’ve been able to receive P25 trunked systems for about $65. One dongle monitors only the control channel and other dongle(s) jump frequencies to receive the digital voice modulation with a program decoding the audio. I can have as many voice receivers as I want whereas a scanner cannot be expanded. Most I’ve heard of is eight. There are some drawbacks like portability. Find out my experiences in my P25 Trunked Tracking post.
Fresh Baked Pi
Raspberry Pi foundation released new models over the last couple months. The biggest news coming at the beginning of February: the Raspberry Pi 2. This model comes with a quad-core CPU and 1GB RAM offering a six times speed improvement, still at $35. Initial reports are it is a lot faster!
Raspberry Pi 2
Along with the new Pi2 came a new version of the Raspbian operating system with optimizations and a new look. In the near future, Microsoft will be releasing a version of Windows 10 Embedded for the Raspberry Pi 2 FREE OF CHARGE! (see the Raspberry Pi 2 link above.)
That’s A Wrap
A goal behind this series has been to expose many hams to newer technologies and younger people to ham radio. These technologies are getting young people interested in experimenting, programming, and even Ham Radio. On podcasts I watch, I’ve heard “I want to get my Ham Radio license” by 20 and 30 year olds like I’ve never heard before. These are young people interested in experimenting, making things, building things, and hacking things — all of which are the foundation of Amateur Radio. Making has evolved into writing software, sending a chip a set of commands and analyzing what is returned, or analyzing packets. Then figuring out “what can I do with this?”
I saw a great technology round-table over the holidays and they talked about getting kids into technology. Many of the methods apply to Ham Radio. As a builder, you build something and presume what will happen. Then something different happens and now you have a mystery to solve. “Why did X happen and not Y?” A new theory develops and sucks you in. This is exactly how the Raspberry Pi, RTL-SDR, and every project surrounding them came to be. It is my opinion that we, as the Amateur Radio community, need to encourage, capitalize, and focus efforts on younger makers and hackers to get them licensed.
As this is my last planned article, I would like to take time and thank the newsletter editors for thinking this series was worth publishing and recreating all the links I included. Thank you to those who told others about this series. I got a ton of feedback and couldn’t be happier that others have found this interesting and sparked them to start experimenting. Most of all, thank you for reading.
I’ve been licensed since 1999 and upgraded to General and Extra in 2008 but I hadn’t been on the amateur HF bands very much. When I graduated from Grad School, I bought myself and setup a new HF station.
This post is going to be about my experiences, things I’ve learned along the way, and maybe some things that may not be obvious to someone starting out. I will add to this post.
This is not meant to be “all-inclusive” by any means and not meant to be a substitute for elmering and experience. It’s meant to be for someone who has operated VHF/UHF for a long while but just venturing out into HF.
I’m bitter in alot of this post because many points draw on real interactions I’ve encountered. It’s not to discourage you to operate HF but to be better than the other guy acting like a jerk. Common sense helps tremendously. Folks out there who are all about the points, number of exchanges, getting that last contact, and awards common sense almost always goes out the window. Just remember you have a choice to not work those stations.
A quick note… ac6v.com has a TON of good information on everything from “antennas to zones.” I think it could be organized a little better and layout is a little 1996ish, regardless 700 amateur radio topics are covered. The Google search at the top really helps finding things.
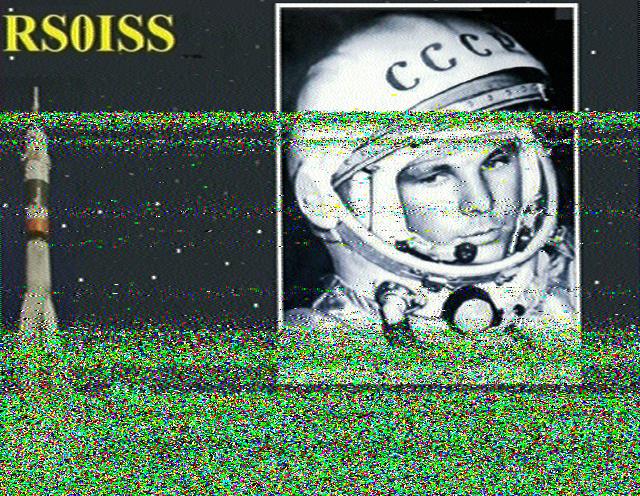
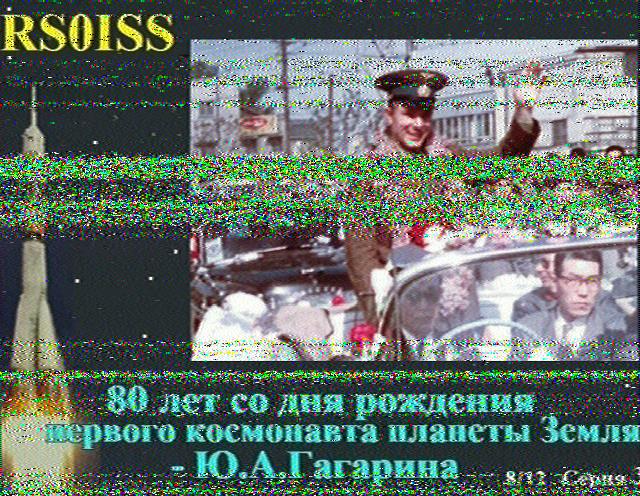
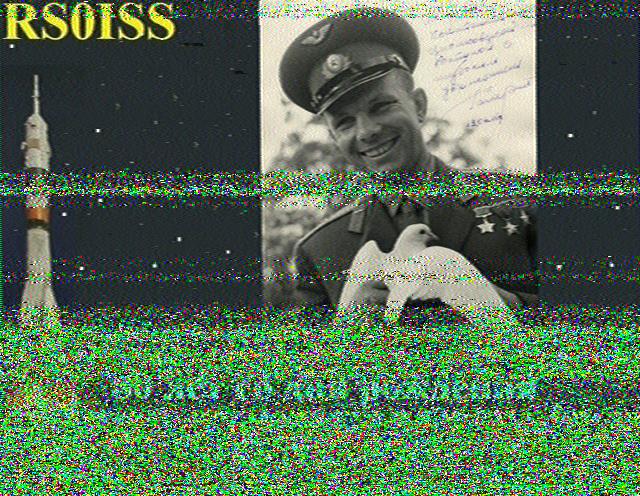
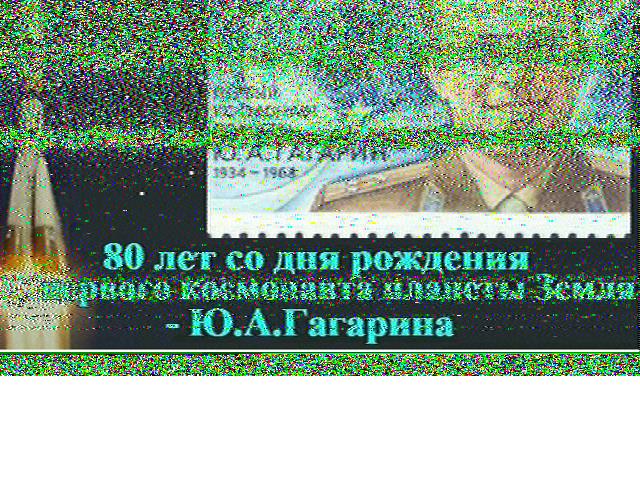
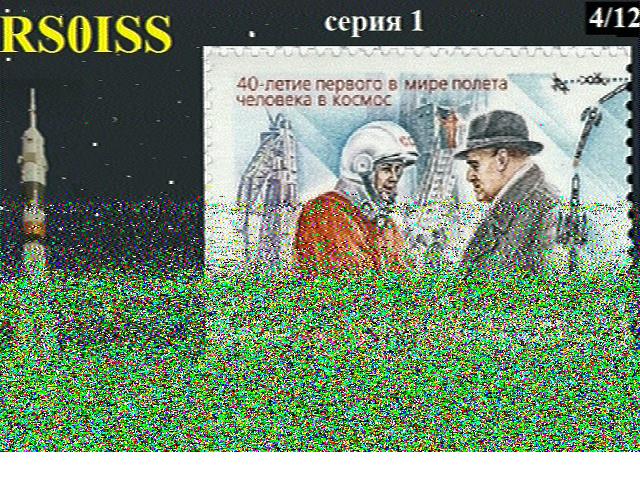
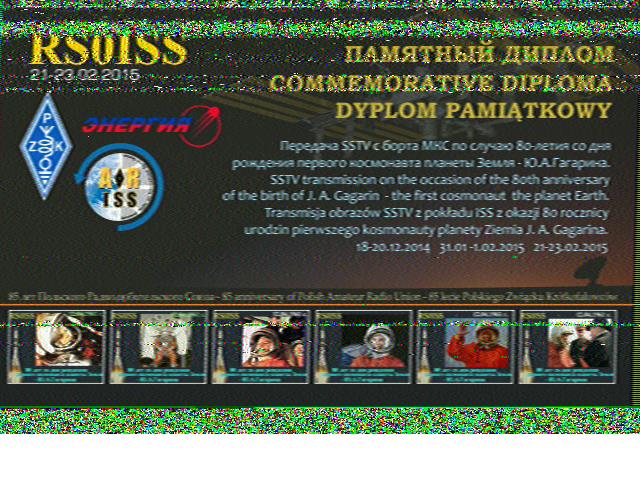
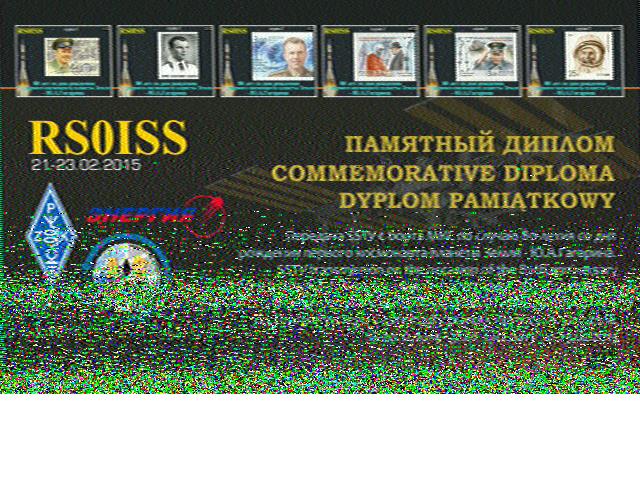
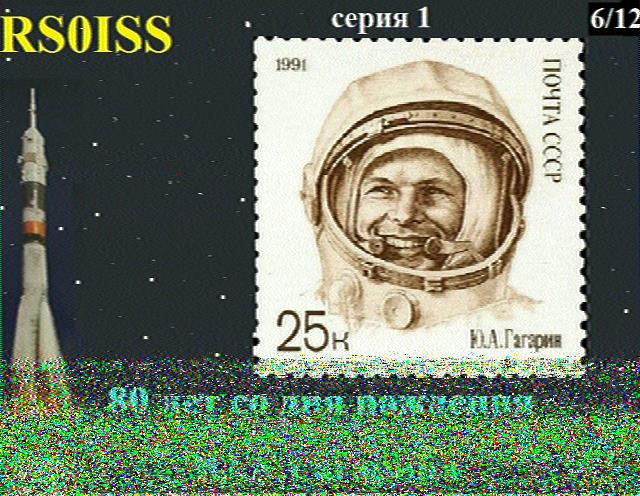
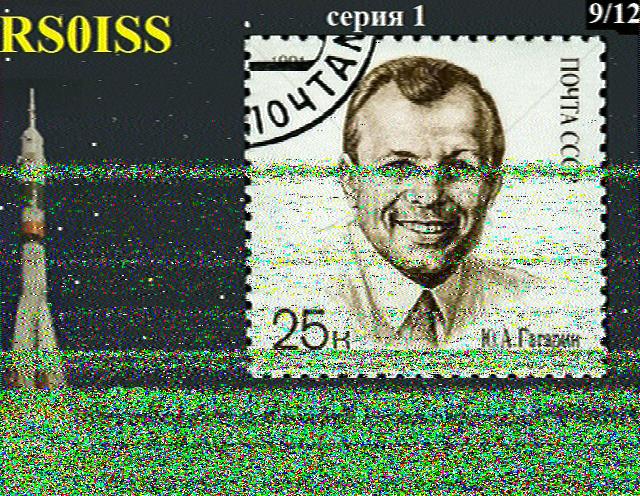
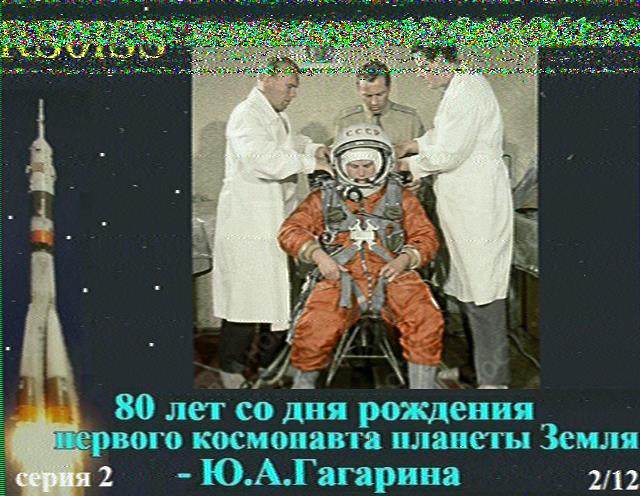
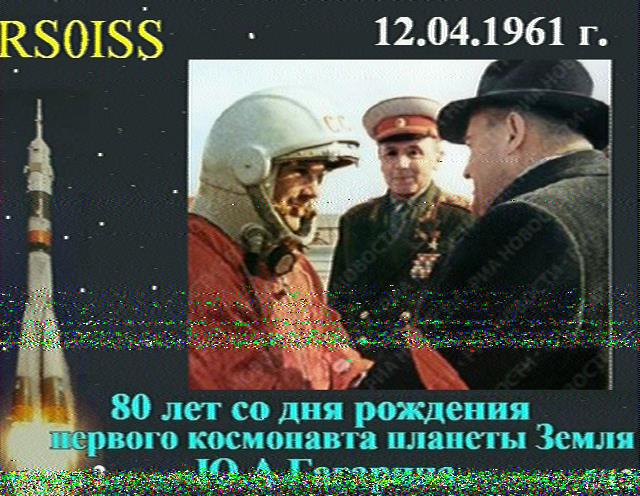
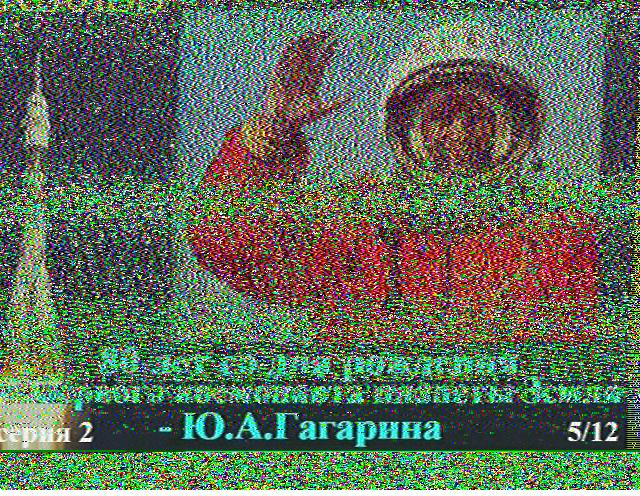
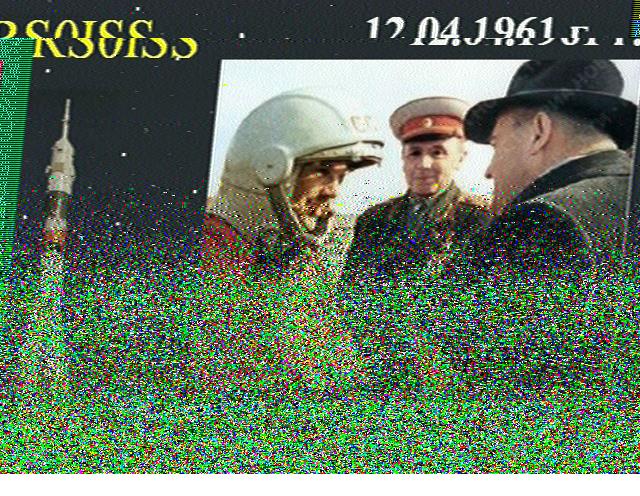
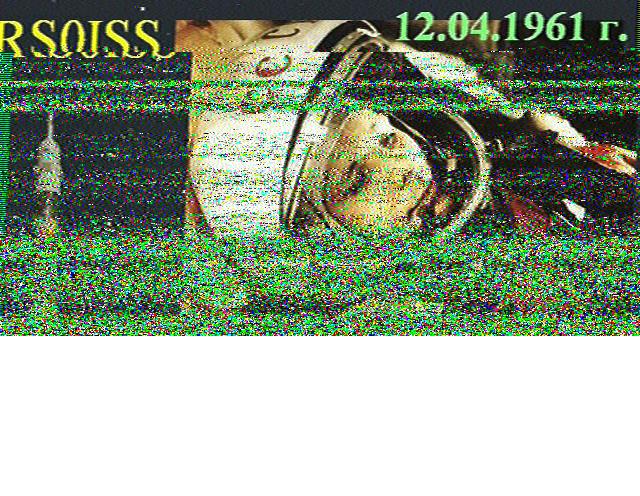
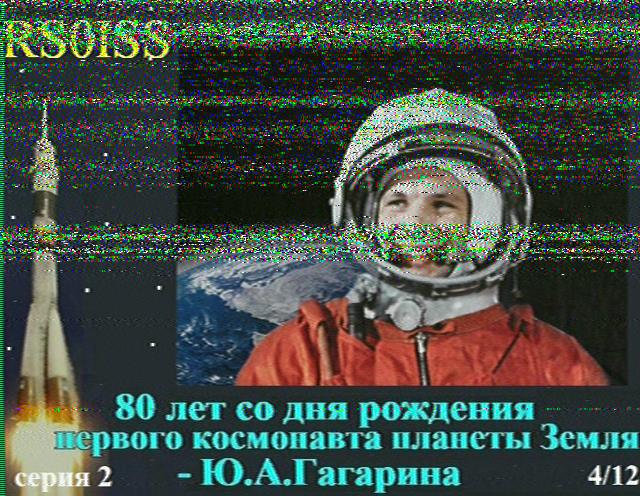
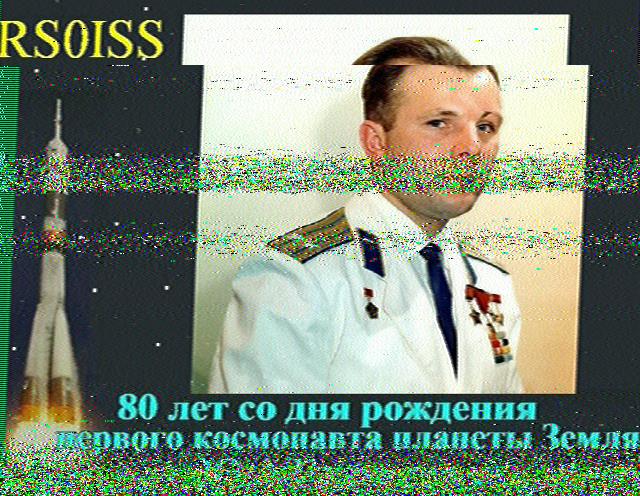
I saw a news story on the ARRL website that talked about the Russian International Space Station cosmonauts plan to send Slow Scan TV images around the holidays. December 18 and December 20, 2014. Those are two of my interests, SSTV (or digital modes in general) and spaceflight. From the news story:
The Russian Amateur Radio on the International Space Station (ARISS) team members plan to activate slow-scan television (SSTV) from the ISS on December 18 and December 20. The expected SSTV mode will be PD180 on a frequency of 145.800 MHz with 3-minute off periods between transmissions.
I setup my station to monitor 145.800 MHz on both days to see if I could receive any images, I did!
Station setup: MP Antennas Classic Mobile NMO Antenna – This is a local company in Cleveland and were reviewed in QST. Been using their antennas for a long time with great success. Since the antenna is multi-polarized (the MP in the company name), it is supposed to be a good substitution for receiving satellite transmissions without a directional antenna and not worrying about Doppler Shift (which needs to be accounted for in some cases). The height is about 15 feet.
The antenna was connected to my ICOM IC-7000 with DSP settings turned off on 145.800 MHz FM. Used this radio only because my SignaLink USB is connected to it and the one I use for digital operation on all bands. MMSSTV is the Slow-Scan TV program I use.