Configure OpenVPN Access Server
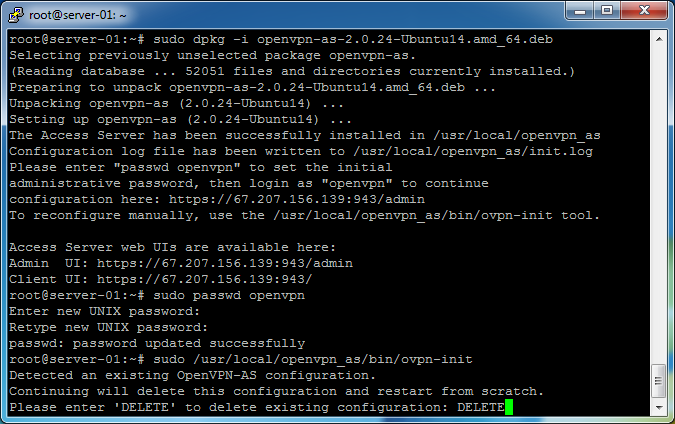
 Post installation messages informs us to chance the openvpn user account password. Enter
sudo passwd openvpn
sudo: runs the password changer as the superuser to avoid any permission issues.
passwd: changes the password for the specified username.
You will be prompted to enter a new (UNIX) password. Make this password strong and hard to guess. It will be used in the web interface to login.
Confirm the new password.
Begin configuring OpenVPN Access Server by entering
sudo /usr/local/openvpn_as/bin/ovpn-init
We will delete the existing default configuration by typing
DELETE
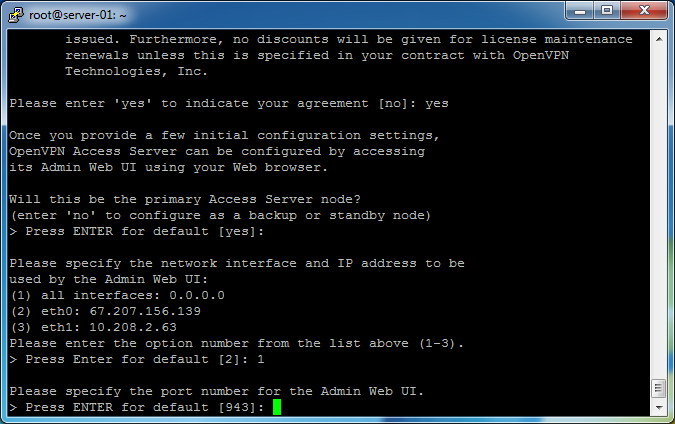
 If you’re not familiar with these type of text based installations, the default option is enclosed in brackets. Seeing [no] and pressing the enter key would mean you chose no. To change the option, you type-in the desired setting to change the option.
Accept the license agreement by typing
yes
Answer these questions as follows:
Will this be the primary Access Server node? yes (default)
Please specify the network interface and IP address to be used by the Admin Web UI: all interfaces: 0.0.0.0
Please specify the port number for the Admin Web UI: 943 (default)
 Please specify the TCP port number for the OpenVPN Daemon: 443 (default)
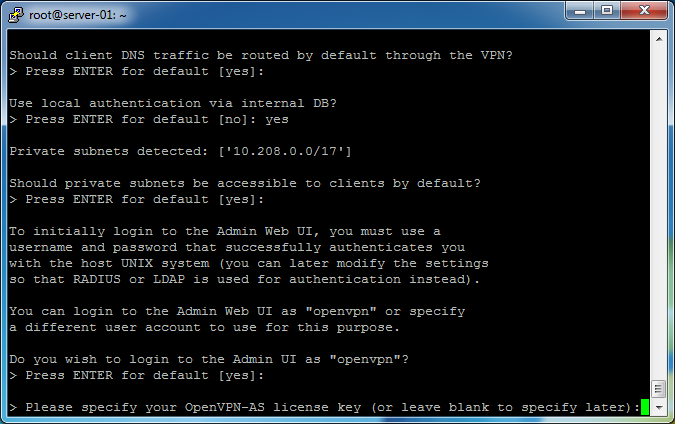
Should client traffic be routed by default through the VPN: yes (default)
Should client DNS traffic be routed by default through the VPN: yes (default)
Use local authentication via internal DB: yes
Should private subnets be accessible to clients by default: yes (default)
 Do you wish to login to the Admin UI as “openvpn”: yes (default)
Please specify your OpenVPN-AS license key (or leave blank to specify later): **leave blank**
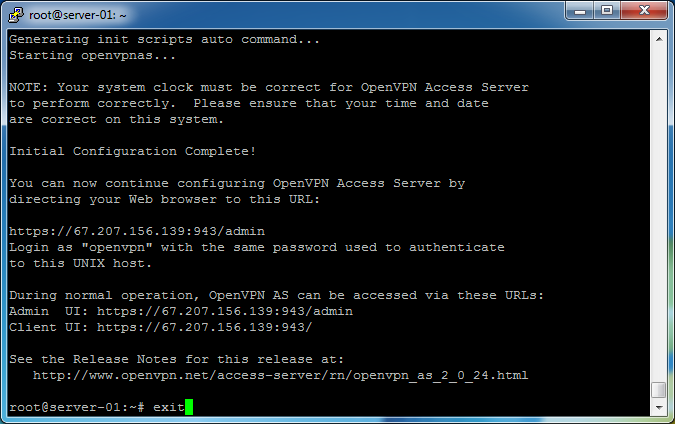
 The server will complete configuration. It will present details of the installation and URLs to access the server. Save these someplace safe.
To close the SSH session, enter
exit
OpenVPN Access Server is configured!
