Bridge server
This server will run the OpenVPN Access Server. The remote network will establish a persistent connection to this server. The home device will establish connections as needed to this server.
It is assumed that you know how to provision this server and have the ability to do so. I’m logging in as root to the bridge, I placed ‘sudo’ in front of all commands that need superuser permissions in case you’re not running a superuser account.
This server is widely available on the Internet so remember to create STRONG passwords for ALL users, including root.
Download and install OpenVPN Access Server
 Go to https://openvpn.net/index.php/access-server/overview.html
Click Access Server Software Packages.
 Click Select under the appropriate operating system for the bridge server.
The server I’m using is Ubuntu. Try these techniques to find distribution, version, and architecture if unknown.
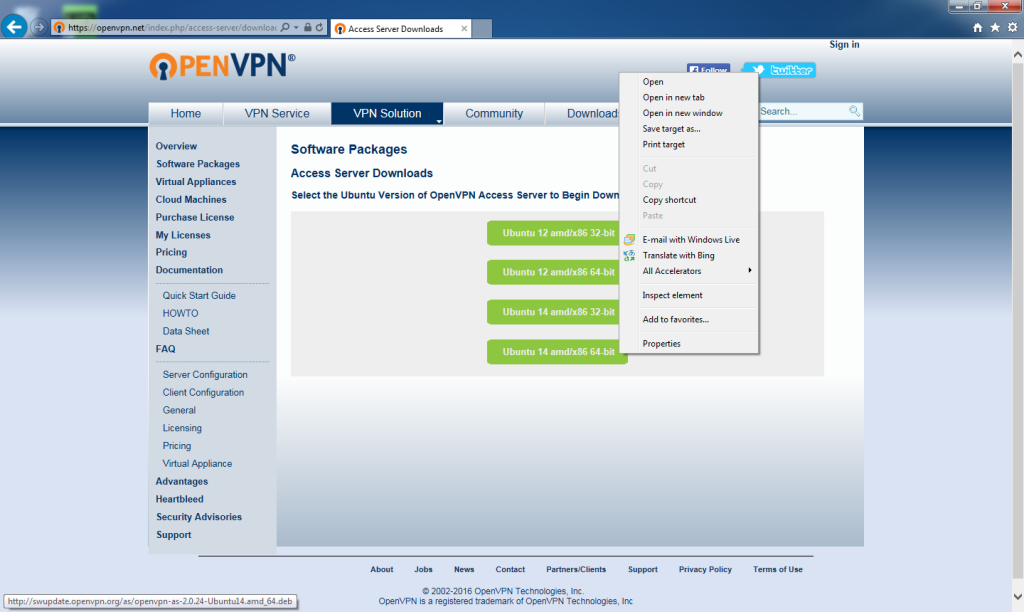 Right-click the version and architecture link.
My server is Ubuntu 14.04 x64.
Click Copy shortcut (‘Copy Link Location’ or similar depending on browser).
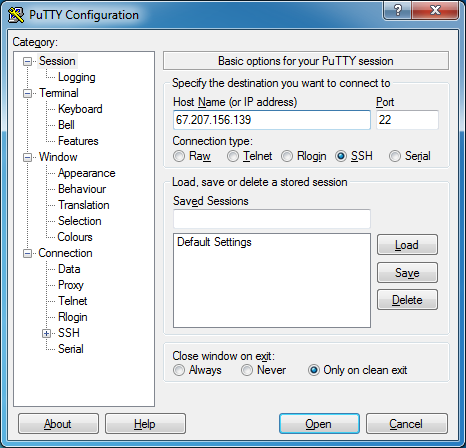
For Host Name (or IP address), enter the IP address to SSH into the server. In this case: 67.207.156.139.
Click Open.
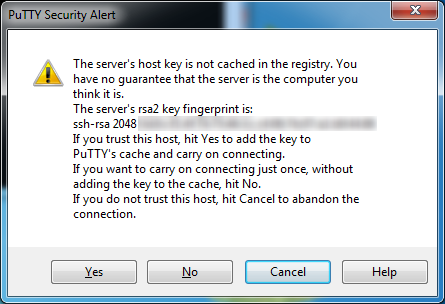 This is not a problem if you’re sure you’re connecting to the correct address.
Click Yes.
 Logon to the server. This information is setup at installation time or provided by your provider.
Though not required for this setup, always keep your server updated. Update the repository archives by entering
sudo apt-get -y update
sudo: runs the package manager as the superuser to avoid any permission issues.
apt-get: is the name of the Debian package manager executable.
-y: with this option, apt-get automatically assumes the default answer to any apt-get prompts.
update: tells the package manager to download the list of available packages from the repositories. It does not update any software or packages.
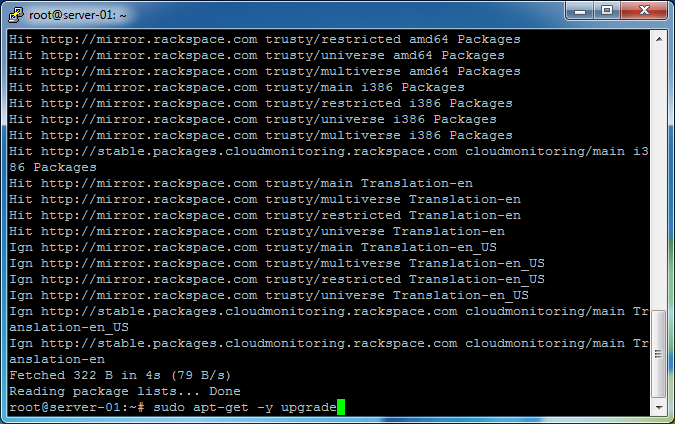 Once complete, update the installed packages by entering
sudo apt-get -y upgrade
sudo: runs the package manager as the superuser to avoid any permission issues.
apt-get: is the name of the Debian package manager executable.
-y: with this option, apt-get automatically assumes the default answer to any apt-get prompts.
upgrade: downloads and installs any updates to packages the manger knows about by way of the repository lists downloaded earlier.
This may take some time depending on the updates that need to be applied.
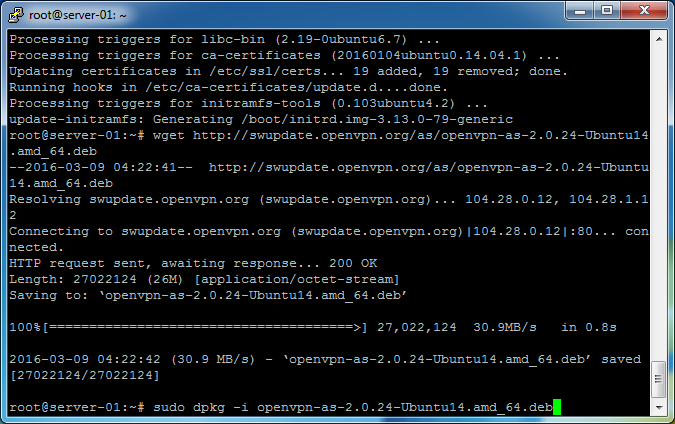 Download the OpenVPN Access Server to the machine by entering
wget
followed by the URL you copied from your web browser earlier. Make sure the URL is in the clipboard otherwise you may run arbitrary commands on the server. Switch back to the browser and copy the shortcut again or paste into Notepad to check.
Pasting can be accomplished by copying text to the clipboard and then using the [SHIFT] + [INSERT] keys to paste in the PuTTY window. Right-clicking can also paste, but I’ve found the keyboard method more effective.
The command will look like this:
wget http://swupdate.openvpn.org/as/openvpn-as-2.0.24-Ubuntu14.amd_64.deb
Install OpenVPN Access Server by entering
sudo dpkg -i openvpn-as-2.0.24-Ubuntu14.amd_64.deb
sudo: runs the package management utility as the superuser to avoid any permission issues.
dpkg: is the package management utility for Ubuntu and Debian operating systems.
-i: installs the specified package file.
The package file name is referenced in the URL from the website.
OpenVPN Access Server is now installed!

