Calibrate RTL-SDR dongle
If you’ve already calibrated your RTL-SDR dongle and know the PPM offset, you can skip this section.
An important thing to know about these dongles: they are cheaply made and not tested for accuracy. They are designed to receive DVB-T signals at a bandwidth of 6 – 8 MHz where a few KHz error doesn’t matter. This is obviously not true when you’re dealing with FM signals that are 15 KHz wide or digital at 12.5 where a few KHz will put you on a completely different frequency or channel.
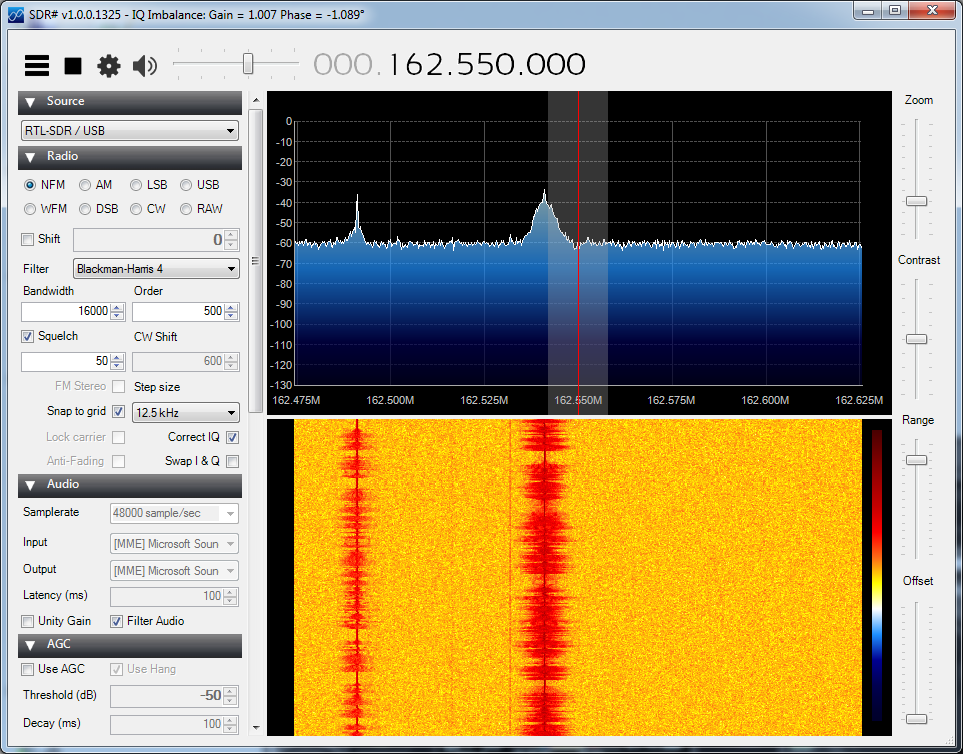
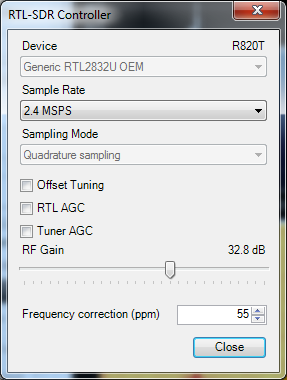
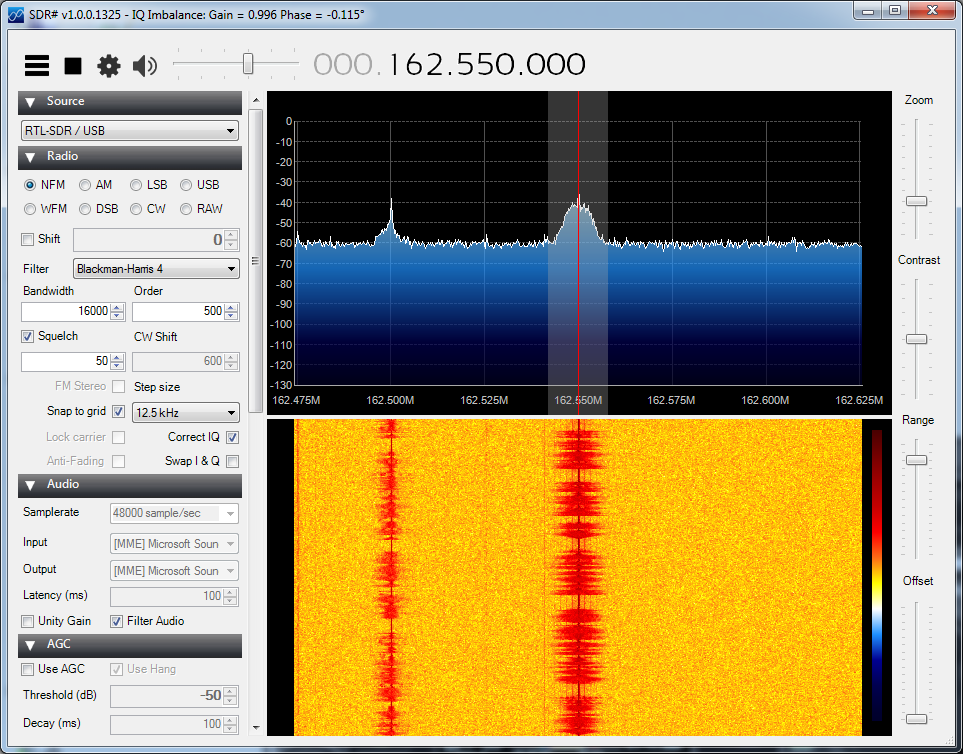
PPM stands for parts per million and is the difference in received frequency vs. frequency shown. To visualize this, use SDRSharp to receive a known FM signal. The center frequency shown will be different from the signal on the scope. Typical PPM offset is anywhere from 45 – 65 and will be in the programs settings. The dongle will drift another 2 – 5 PPM over the next 20 – 45 minutes as it warms up. PPM number will change with ambient temperature extremes. Gain is obviously another setting that will help you receive signals. The RTL AGC setting works but will err on the side of too much gain. Manually, using more than 32.8 dB will overload and produce duplicate signal spikes. The Correct IQ setting will get rid of phantom spikes at lower gain settings.
Dongle with no frequency correction. The actual 162.550 frequency is just to the left of the displayed frequency. 162.550 is one of the NOAA Weather Radio frequencies.
Shows the gain and PPM frequency correction of 55 for the dongle I’m using.
Shows 162.550 centered with frequency correction applied.
The crystals on the RTL-SDR dongle can be replaced with higher accuracy temperature controlled crystals (TCXO) that have a variance of 1 ppm! These crystals are $10 but you have to wait for them to ship from China. Pre-modified dongles are available but you will pay three times the price for the dongle.
Run the calibration for 15 minutes to obtain an accurate result. Speculation suggests this may take as long as 45 minutes. Note the Frequency correction (ppm).


